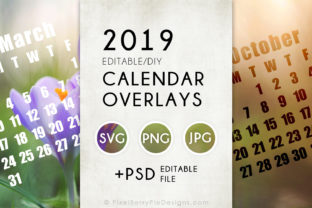
2019 Calendar Overlay Templates PSD: A Practical Resource for DIY Calendar Design
Building a calendar from scratch takes time. You need to align grids, set up typography, manage print margins, and ensure every month flows consistently. That is why a resource like 2019 Calendar Overlay Templates PSD exists: to remove the repetitive structural work so you can focus on design, branding, and personalization. Whether you need a single month for a promotional post or all twelve months for a printed planner, these templates give you a solid starting point without forcing you to rebuild the calendar frame every time.
This download includes pre-made calendar months in EPS, SVG, and PNG formats, plus a layered PSD file where every month sits on editable text layers. The vector files let you scale layouts up to billboard size or down to a pocket notebook without losing quality. The PNG versions sit at 1000 pixels wide, ready for quick use in digital mockups, social media graphics, or email headers. And the PSD file gives you full control over fonts, colors, spacing, and decorative elements. You do not get the sample photos or fonts directly in the download, but a text file points you to free sources online so you can source those assets yourself.
Where This Template Fits in Your Workflow
Calendar design rarely happens in isolation. You might be producing content for a blog, building a printable planner for your Etsy shop, creating a branded wall calendar for your team, or generating social media posts that highlight upcoming promotions. Each of those tasks involves a different output format, resolution, and aesthetic. 2019 Calendar Overlay Templates PSD adapts to these contexts because it gives you multiple file formats from a single source of truth.
Think of the template as a bridge between your design software and your final output. You open the PSD, adjust the text layers to match your brand fonts, drop in your own background images or patterns, and export to whatever format you need. If you are working with a vector illustration that you built in Adobe Illustrator, the EPS files integrate directly into that environment. If you prefer a raster workflow in Photoshop, the PSD structure lets you stay within one application.
This approach saves you from the time-consuming repetition of drawing calendar grids month after month. Instead, you invest that time into refining the visual details that make your calendar stand out.
Before: Planning Your Calendar Content
Before you ever open the PSD file, you can use the SVG templates as planning tools. Import one month into a wireframing tool or a presentation deck to map out where you will place event dates, holidays, or editorial deadlines. Because SVG files are lightweight and scale without distortion, you can treat them as placeholders while you figure out your layout hierarchy. This is especially useful if you are collaborating with a team that needs to approve the grid structure before you begin the visual design.
You can also use the PNG versions to create quick mockups for client pitches. Load a transparent PNG month overlay onto a photo of a desk or a wall, and you have a realistic preview within minutes. No need to open a design application at all at this stage.
During: Building the Actual Calendar
When you are ready to produce the final calendar, the PSD file becomes your main workspace. Each month lives on a separate text layer, so you can change all the date numbers, month names, and day-of-week labels without affecting the layout. The premade vector files in EPS and SVG act as backup sources if you need to rework the grid geometry. For example, if you want to adjust the spacing between rows or change the column widths, open the EPS file in Illustrator, make your structural edits, and then bring the updated vector back into Photoshop as a smart object.
This layered approach keeps your editing organized. You can toggle visibility of individual months to work on them one at a time without visual clutter. If you only need January for a New Year promotion, you can hide the other eleven months and concentrate on that single layout. The files are already split into dedicated subfolders, so you never have to hunt for the right format.
After: Exporting and Repurposing
Once your calendar design is final, the real versatility appears. Export the full twelve-month set as high-resolution PNG files for print. Export individual months as JPEGs for social media posts. Pull the SVG versions into a web project to create interactive date pickers or event pages. Because the vector files are resolution-independent, you can also repurpose the calendar designs for merchandise such as mugs, tote bags, or desktop wallpapers.
If you manage multiple brands or channels, keep the base PSD file as a master template. Each year, duplicate the file, update the dates, and generate new assets without starting from scratch. The PDF links and font references are stored in the included text file, so you can quickly locate the free resources you used and verify they are still available.
How the Templates Interact with Other Tools and Assets
2019 Calendar Overlay Templates PSD is not a standalone product. It works best when you combine it with your own library of photos, illustrations, patterns, and typography. The text file that comes with the download lists free sources for sample photos and fonts, which means you can treat the template as a modular component rather than a finished piece.
If you use stock photography regularly, you can match the calendar months to your existing visual style by dropping your own images behind the transparent PNG overlays. If you are a graphic designer who prefers vector icons, you can open the EPS files in Illustrator, add icons for holidays or special events, and then export the final vector sets for use in brochures or flyers.
For those working with print-on-demand platforms, the 1000-pixel PNG files are ideal for preview images. You can upload them directly to product listings without resizing. For higher resolution print requirements, the EPS and SVG vectors scale cleanly to 300 DPI at any physical size. The templates also work alongside layout software like InDesign or Affinity Publisher: export the months as SVGs and place them into your document as linked graphics.
Practical Implementation Tips
- Edit text layers before adding effects. Change all the month names, day labels, and date numbers in the PSD file before you apply drop shadows, textures, or gradient overlays. This way you avoid reworking effects if you need to adjust a misaligned date.
- Use Photoshop layer groups for each month. The PSD file already separates months into individual layers, but you can group them further into quarters or seasons. This helps when you need to apply global color corrections across three months at a time.
- Save your own font combinations. Once you select a typeface for the month headers and a separate one for the numbers, keep a note or a layer style preset so you can reapply those choices quickly next time.
- Batch export with actions. Record a Photoshop action that exports each month as a PNG at your desired size and resolution. Run the action on the entire layer set and you will have all twelve files ready in under a minute.
- Leverage the vector formats for non-standard shapes. If you plan to create a circular calendar or a folded greeting card, open the SVG files in a vector editor and apply clipping masks. The grid stays intact while the overall shape changes.
Organization, Consistency, and Quality Control
When you produce a calendar that spans twelve months, consistency matters. The 2019 Calendar Overlay Templates PSD ensures that every month shares the same grid dimensions, alignment, and spacing. That foundation alone eliminates a major source of visual inconsistency. You can change color schemes or backgrounds for each month without worrying that the dates will shift position.
From a quality control perspective, the multiple format options give you a safety net. If you accidentally flatten a layer in the PSD file and lose editability, the EPS or SVG source still contains the original geometry. Keep the vector files as your master backup and work on copies. This habit protects your work even if you are editing late at night or under a tight deadline.
Organizing your own assets around the template also improves efficiency. Store your background images, your selected fonts, and the text file with resource links inside the same folder structure as the template subfolders. That way everything you need for next year's calendar is already grouped together.
Long-Term Use and Adaptability
Although the template is built for 2019, the structure is not locked to that year. The PSD file contains editable text layers, so you can update the date numbers and day labels for any year. The grid itself is generic enough to work for any monthly calendar layout. Repurpose the vector files for other time-based graphics such as project timelines, editorial schedules, or event countdowns.
If you run a small business or a creative studio, consider keeping the template as part of your permanent asset library. Every time you need a quick calendar overlay for a proposal, a social media campaign, or a promotional giveaway, you open the master file, swap in the relevant month, and export. Over multiple years, the time saved adds up significantly.
The included text file also serves as a running record of the free resources you used. When you rebuild the calendar for a new year, you can revisit those same sources to check for updated fonts or fresh photo collections. This lowers the cost of maintaining a consistent brand aesthetic across annual cycles.
Making It Your Own
The biggest advantage of 2019 Calendar Overlay Templates PSD is that it does not impose a finished look on you. The premade basic template gives you the skeleton. You supply the personality. Whether you prefer minimalist sans-serif numbers over a muted photograph or bold script headers on a colorful gradient, the editing environment in the PSD file is straightforward enough for a beginner and flexible enough for an experienced designer.
If you are an educator building classroom materials, you can drop in themed clip art for each month. If you are a freelancer managing client projects, you can color-code months by project phase. If you are a blogger planning content themes, you can set each month against a complementary background image that reflects your seasonal topics.
The only limits are your own creativity and the time you have to experiment. Because the structural work is already done, you can use that time to explore different visual directions without worrying about breaking the calendar grid.
Ready to Start Working with the Templates
To get the most out of this resource, start small. Pick one month from the PNG folder and place it over a photo you already own. Adjust the opacity, add a subtle border, and see how the layout feels. Once you are comfortable, move to the PSD file and customize that same month with your chosen fonts. Then scale up: duplicate your approach across all twelve months, using the vector files for any months that need custom grid adjustments.
Keep the source files organized in the same folder hierarchy as the download. Create a working folder for your final exports and a separate archive folder for the templates. That simple habit makes it easy to return to the templates next time you need a calendar overlay without digging through old project files.
Whether you produce one month layout at a time for a series of social posts or all twelve months for a printed annual planner, 2019 Calendar Overlay Templates PSD gives you the structural consistency and format flexibility to execute cleanly. Spend your effort on design, not on drawing grids.